How to Root Samsung Galaxy J7 Prime with OneClick APK (Without PC)

If you own a Samsung Galaxy J7 Prime, regardless of any variant or model, and you want to customize your device, then you are on the right page.
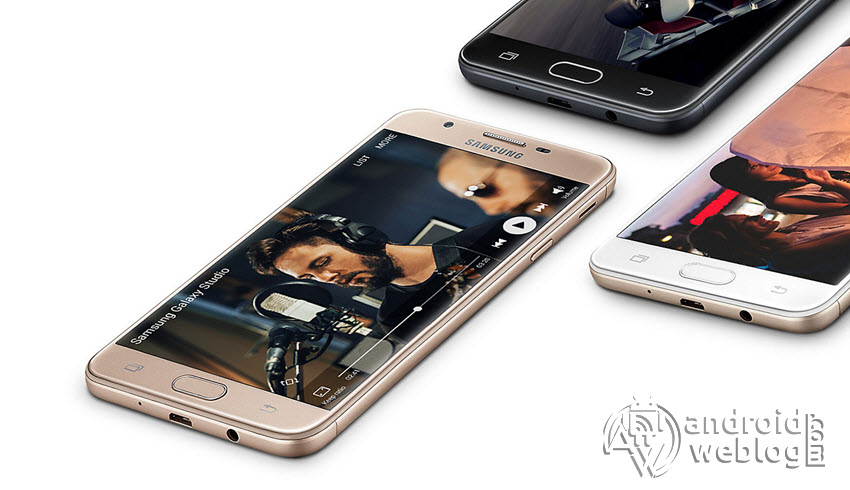
The Xiaomi Redmi Note series is undoubtedly biggest threat to the Samsung Galaxy J series smartphones. If Xiaomi was not there, then Samsung could have ruled this price segment, but nowadays both are the competitors. Some users believe that Xiaomi is a Chinese company, and they often go with Samsung Galaxy J7 smartphone, based on the trust Samsung got over the years. Samsung Galaxy J7 Prime comes with 1.6GHz Octa-core processor, along with 3GB of RAM. It features an F1.9 lens, which enables to capture the bright images, with vivid detail and crisp and clear quality. The device features the ‘Wide Selfie’ function, due to which more people gets fit in group photos, clicked by it’s 8MP selfie camera. The smartphone has a fingerprint sensor, on the front side of the device, which unlocks the device quickly and securely within a second. The 3300mAh battery powers the device, the Ultra Power Saving mode turns off all the background apps and extend the battery backup. The PLS TFT LCD display resolution is 1080×1920 FullHD with 16M colors. The 3GB RAM, 1.6GHz CPU, and 16GB ROM, makes the phone a complete powerhouse. The device supports the 4G-LTE, 3G connectivity, and weighs 167grams.
If you are an Android Enthusiast, and want to Root and Install TWRP recovery on your beloved, then you have landed on the right page. In the due course of the article, we will guiding you through the process to root Samsung Galaxy J7 Prime .
If you want to unleash the full potential of the hardware of your Samsung Galaxy J7 Prime , then rooting and flashing custom recovery like TWRP is the main concern. The Stock ROMs have often limited and unsupported features in the sense of Customization. When you have a rooted device and also flashed TWRP recovery, then you are free to install any Custom ROMs, Mods, Kernel, and Xposed etc., as well as many apps which requires root access to work properly. You can easily root the device with One Click Android Root Tool, with either via PC or through the APK, which is a quick process.
Disclaimer: The AndroidWeblog.com covers although everything in a very neat and a processed manner so that our readers get exactly what they want, still there are meager chances of basic issues that may arise out of the listed steps here. Hence it is in sole interest of the user to follow the steps very cautiously so as to stay away from any mishappenings with your device.
Rooting and flashing the Custom ROM firmware, certainly without any doubt voids your devices warranty and AndroidWeblog.com in no way will be held responsible for warranty void or your bricked device.
Table of Contents
Prerequiste
Ensure to check your model number, which must be:
- Samsung Galaxy J7 Prime
You must have to ensure that prior to rooting your phone , you have read thoroughly the disclaimer and you agree to proceed further on your risk.
- Phone Should be Charged
Your phone must be 70% charged at least, else, it may lead to complications sometimes while experimenting. Why to take risk, try to charge it fully.
- Back Up
If you are either going to root your phone or install a Custom ROM, it is a good habit to make a back up of your phone. Make a back up of all your media like images, videos and all on your PC and your contacts on Cloud.
- Enable USB Debugging
(Applicable only for PC method, Skip if you will use APK method)
You must enable USB debugging option by going in to Settings, Applications and Developer options.
Downloads For Rooting Samsung Galaxy J7 Prime
Download the device drivers from the manufacturer’s website, otherwise the KingRoot PC will install the drivers in your computer. (Note: App method doesn’t require any drivers, because it works without PC)
Download KingRoot APK for Android from here.
Download KingRoot for Windows from here.
Procedure to Root Samsung Galaxy J7 Prime (Without PC with KingRoot APK)
Make sure that you have downloaded the required files (link in pre-requisite section of this article). Then, proceed to the steps.
Step 1: Open the browser of your phone and enter the address: kingrootapp.net. Then Download KingRoot APK for Android.
Step 2: As soon as KingRoot download would complete, then immediately tap on the drop-down notification bar to begin installation process.
Step 3: If by-default your device was set to ‘Install Blocked’, then you might get message ‘installation blocked’. Don’t bother just tap on ‘Install anyway (unsafe)’ to skip the same, or manually enable the the installation in the settings. Settings>Lock screen and security>Unknown sources and enable the same.
Step 4: After enabling the installation, you will be prompted with ‘KingRoot’ installation screen. Just tap on ‘Install’ to begin the installation process. After the installation is complete, tap on ‘open button’ and this will start the KingRoot app.
Step 5: Without wasting any time, tap on ‘Try it’ button followed by ‘Get now’ just below ‘Root access not available’. This will start the rooting process.
Step 6: Now, rooting process has been finished and completed. After your device is rooted, you will return to the main screen, and this will finish the rooting process.
How to Root Samsung Galaxy J7 Prime (With PC with KingRoot for Windows)
Step 1: Run the ‘KingRoot for Windows PC’ setup file and install the software. After installation process completes, click on (completed to complete the setup.
Step 2: After enabling the USB Debugging Mode ‘On’, connect your Samsung Galaxy J7 Prime to the computer via USB cable. After the device is plugged in, the KingRoot will automatically detect the Model number and Android version of the device. If your computer have already driver installed, then it will be a quick process, otherwise KingRoot will install drivers (Internet Connection required).
Step 3: If USB Debugging Mode is already enable, then you will see the ‘Root (Attempt to root) buttons on the screen. Just click on the ‘Root’ button and this will begin the process.
Step 4: Monitor the rooting process with progress percentage bar, and the process will be completed in few minutes. The device will reboot several times during the process.
Congratulations, now you have rooted Samsung Galaxy J7 Prime . Now, you can install Xposed Framework, and customize your smartphone as per your preference. If you wish to verify, you may download and check the Root Status through Root Checker app.


